I went into my sewing room yesterday to clean up after the Fall Festival madness and got very sidetracked. I grabbed a pile of hand dyed fabric scraps left over from wrapping my soaps and had the pile over the trash when I realized they could still be used. I dyed up this bunch of fabric using some hunter orange fabric I got from one of my friends. I had almost 70 yards of the stuff and only needed to make one hunter jacket. So I dyed it. I have been finding uses for it for years. Now what is left of it is used to wrap my handmade soaps.

Supplies:
Fabric strips 1" to 2" wide - just whatever you have
2 pieces of cotton batting or tight poly batting slightly larger than the finished hot pad you want to make
Backing fabric
thread
Binding fabric
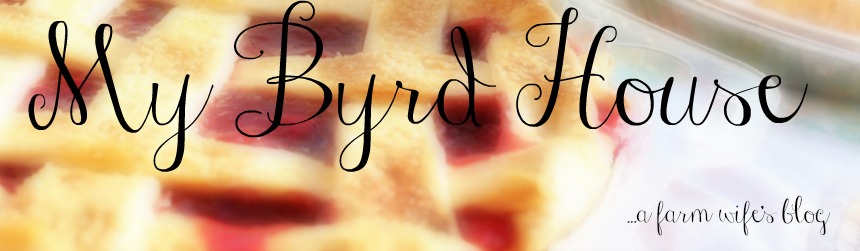
To start with I just randomly sewed together the strips I had. They were about 9 inches long.
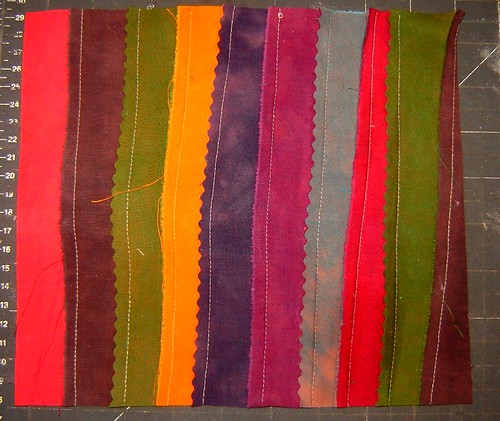
Then I used my rotary cutter and squared it up.
I cut it to be 8 1/2" by 9 1/2". The size doesn't matter. That is just how big it could be to get it all square. I have large hands and like a large hot pad when cooking so I don't get burned. I also like larger hot pad for putting a hot pan on the table.
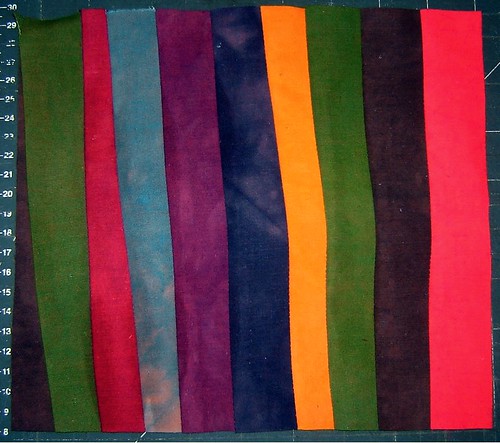
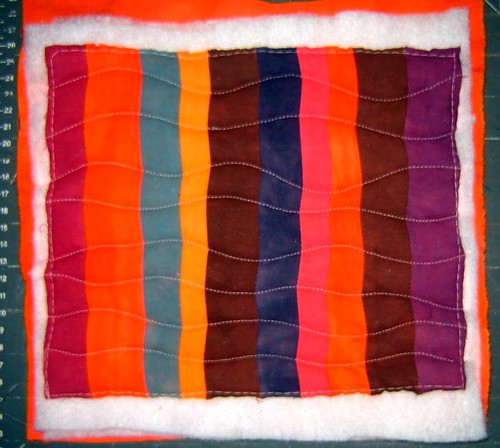
Next I layered my top, batting, and backing. I cut the backing last to make sure it was wider than the other two layers. I do this so that if the thing shifts while quilting it, I won't find that the back is now smaller than the front or off center by a fraction.
Then I pin the layers together
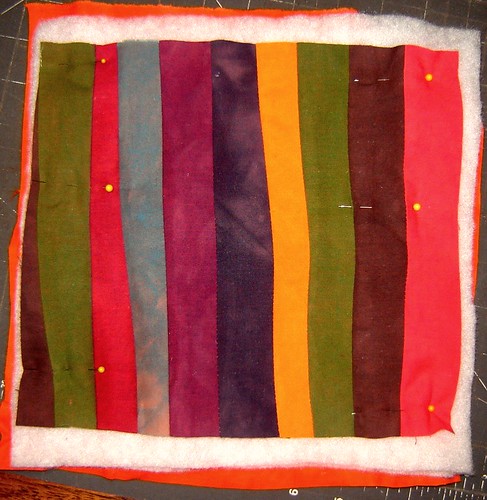
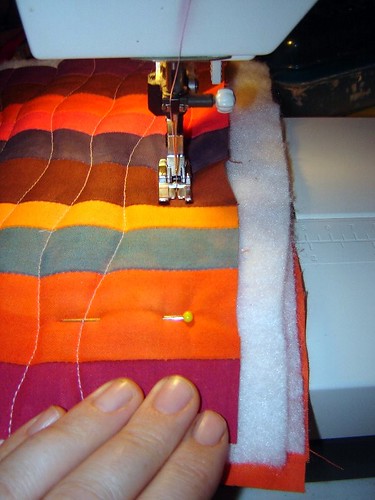
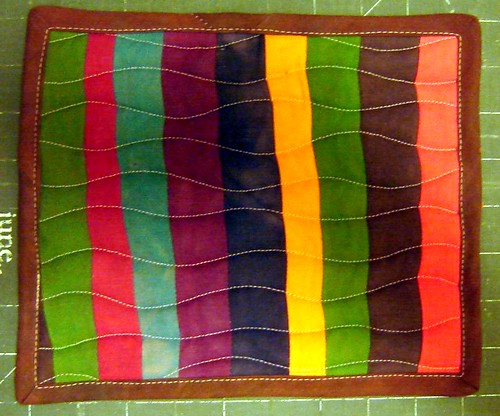
Next you bring it back to your sewing machine and quit it. YES YOU CAN QUILT IT TOO. I just did stitching back and forth. Since I am no good and a straight line, I did wavy. You can do all kinds of fancy things but this is the easiest.
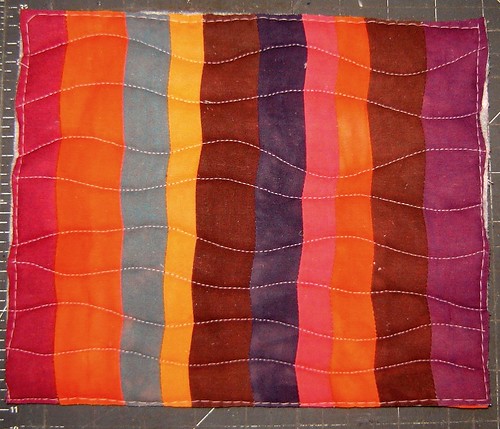
When I have enough quilting in it for me, I stitch all around the edge to make sure it is secure.
Then I square it back up again.
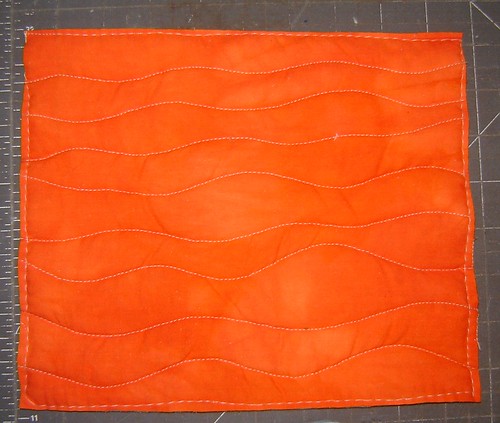
This is what the back looks like.
Then I bind it.
Sorry I won't show you how I bound it because I am a binding spaz but I will direct you to some great binding tutorials I used.
Sandi Henderson's Bias Tutorial
Angry Chicken's Bias Tape tutorial (all on the machine)
Heather Bailey's How to Bind a Quilt Tutorial
Very cute hot pads! What kind of batting did you use? It looks like you have two layers of batting. I just read in the Fons & Porter's quilting magazine about heat resistant batting. Have you ever heard of it before?
ReplyDeleteThanks Lucy! You made that all look very easy. I have some pieces I am going to do this with now and use for gifts at Christmas.
ReplyDeleteWhen I saw this even before I had read it I thought, I have all those soap strips I have saved from your soap. I could make some of these. Then I read your post and laughed cuz you had used your left over soap strips.
ReplyDeletevery cute....terrific tutorial. I will be using it soon! Thanks for sharing!
ReplyDeleteI love the wavey lines! I'm a binding spaz too (I do fine on big things but freak out on small things like this).
ReplyDeleteOoh, super pretty!
ReplyDeleteThese are very cute! I bookmarked the tute so I could use it later this month when I start my gifts. I'll be sure to check back for more great ideas to come. I'm a sucker for easy gift ideas!
ReplyDeleteThis is fantastic! I'll be linking to this!
ReplyDeletei love this! it seems so simple and your how-to makes perfect sense! thanks so much!
ReplyDeleteYou do the best tutorials..I love this hotpad and will make one for myself..Thanks a bunch.!!
ReplyDeleteI love any ideas that use up scraps! Thanks!
ReplyDeleteI love your blog spot and all the cool aprons and patterns and crafts and everything!! I like your music too!
ReplyDeleteThis is so great! I am learning to quilt and have been practice "the wave." You've made it look so beautiful.
ReplyDeleteThis is very cool - what a great idea as a housewarming gift. I hope you don't mind, but I posted a link to this in my blog post about projects that take advantage of your craft/fabric stash. Great job!
ReplyDeleteThanks so much for a really great pattern and great way to use up stash! And what great music to listen to while I surf your blog!
ReplyDeleteI was just thinking the other day that I should make hot pads from my scraps. You beat me to it. :)
ReplyDeleteThanks for the tutorial.
Cute hot pad. Thank you for the tutorial
ReplyDeleteHow awesome! I love these! I'm making a trip very soon to see my elderly aunt who is still very active in her kitchen. This is the exact gift I was looking for. I'll start on them this afternoon! You made me giggle with your "spaz" binding comment. I can so relate!
ReplyDeleteThanks for posting binding links!
i LOVE, LOVE, LOVE these! I can't wait to try them out - I have some really cute strawberry scraps that I think would be great with these!
ReplyDeleteI love the ideas, BUT LOVE the music!
ReplyDeleteBrill. I think I'll start making some of these to make up Christmas boxes for friend and loved ones . I loved this tutorial . Easy peesy just how I like it. And thanks for the links too . Watched a funny one and learned there too. X
ReplyDeleteWhat a great way to use up those odd scraps! How much nicer to set your table with hot pads you made yourself than buying them?
ReplyDeleteBeing a rough at best sewing gal, these seem like a great beginner project as well-just love them!