home tutorials recipes aprons/patterns Soaps

Sunday, May 31, 2009

Muskogee Ren Fair Fun - Picture Heavy

We finally got to go to a Renaissance Fair. Muskogee Oklahoma is only 2 1/2 hours away from us so we were able to make that festival. It was worth the ride in the car with five kids and the fee to get in. We were able to go on Memorial day because we only get National holidays off. Lucky for us it was a Monday too. We had so much fun and decided that this would be our Memorial Day gig for a while.
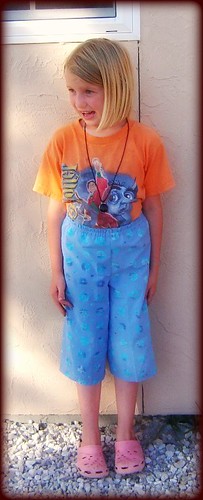
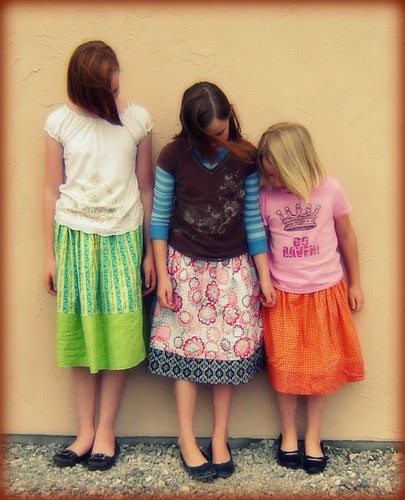
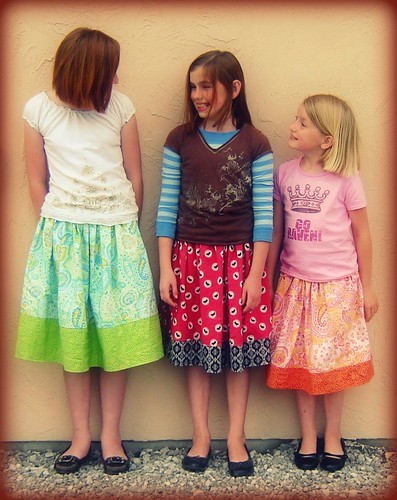
Here are the obligatory Family photos.
Hobbits 2
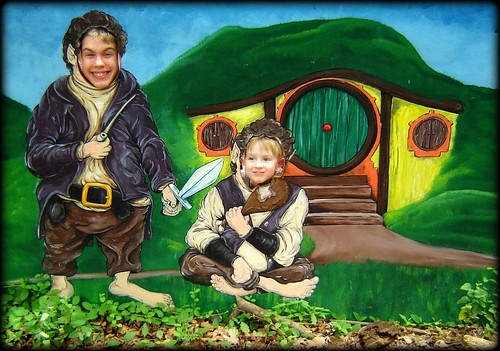
Sorry you say cheese and these boys start hamming it up!
Hobbits
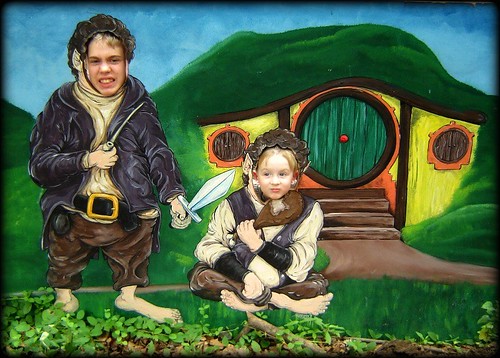
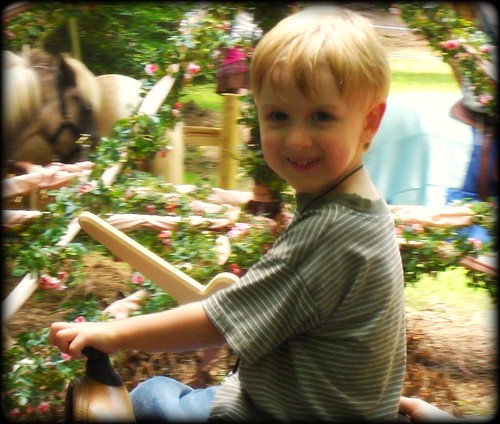
Sting gave him courage!
They had a children's land where it was totally kid oriented. They kids loved it!
They had a pony ride that the girls and bubby just loved.
Jeddie 1
Caroline 2
Jeddie 5
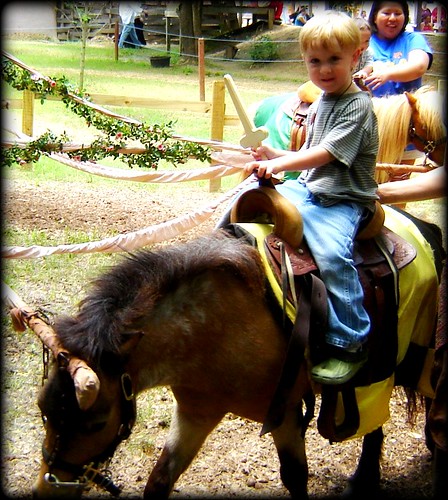
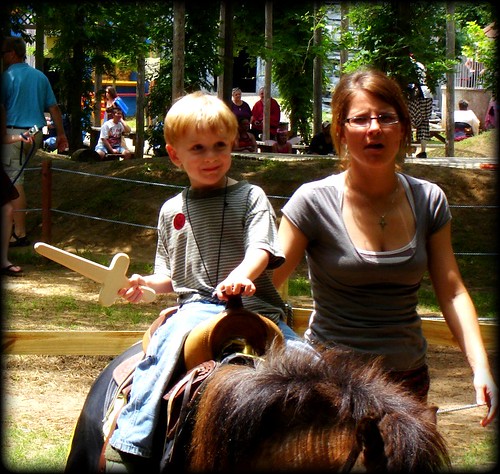
Just look at that face. He was in little boy heaven. I wish I could have heard what he was thinking. His eyes were so big all day with all the knights, pirates, and real armor everywhere.
Hannah
Jeddie 2
Sarah
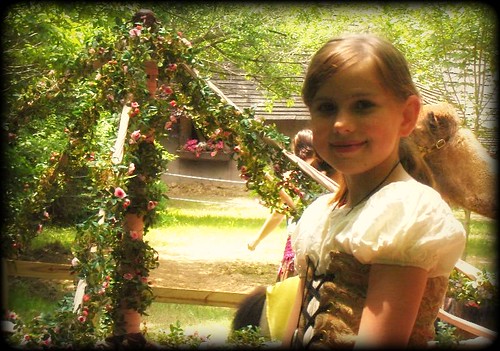
The archery booth was a big hit too.
Sarah 3
Sarah 2
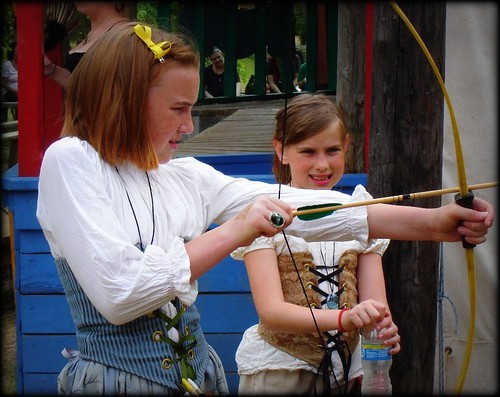
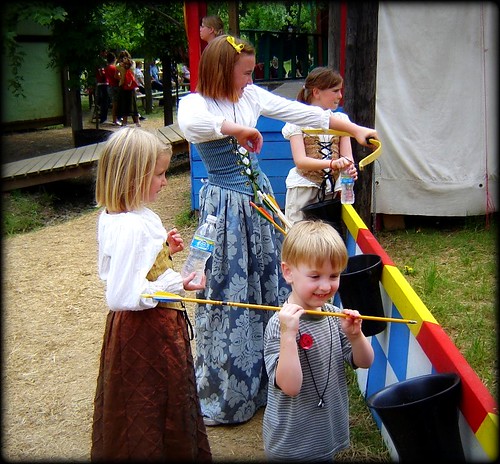
Man I wish my corset fit like that! She also had pretty good aim. I was impressed.
Jeddie 6
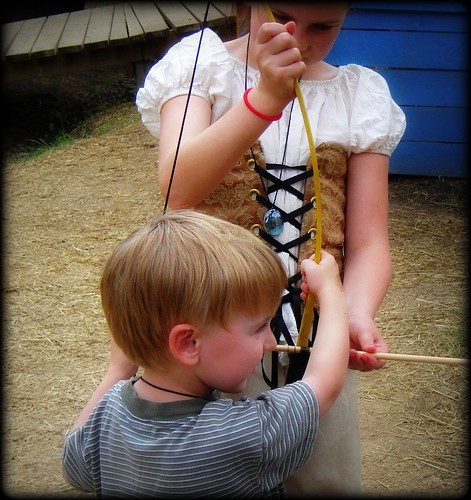
The bow string was so tight he couldn't pull it back so bubby decided to just chuck his arrow over the barrier at the target.
Joe
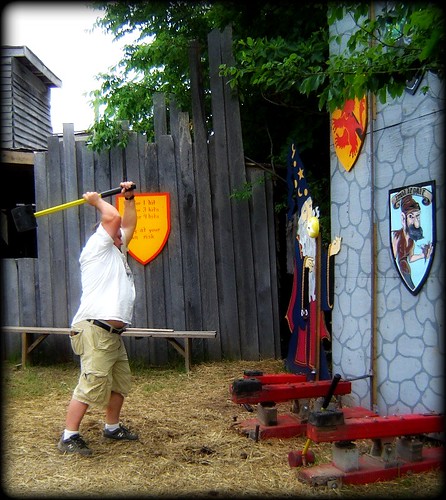
There were three times Joe lost his cool guy face; at the archery booth, at the armor shop, and at the knife shop. It was so funny watching him battling being 13 and being in such a groovy place.
Hannah 2
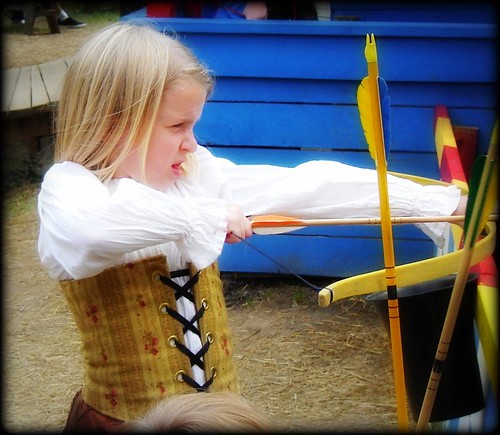
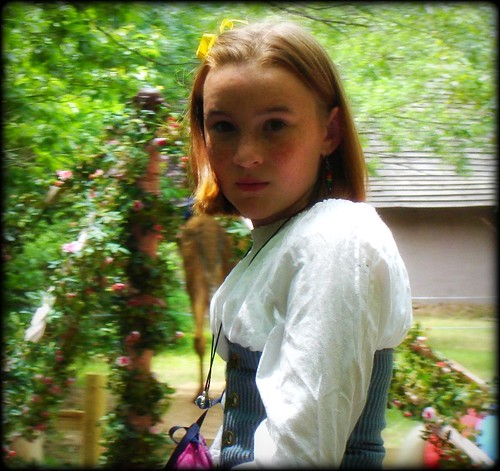
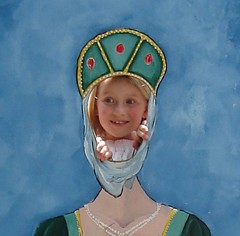
Isn't that a total Lucy Pevensie face?!? She was dangerous though because she would get distracted by us and turn to look and accidental let arrows fly in our direction. SCARY!
Jeddie 4
Bubby picked these up right after we got there. Everywhere we went he had to have them in his hands and would hold them up every time we passed a knight just to show he was one of them. It was so fun to watch his face. One of the shop owners just about died laughing watching him eye a knight's sword. His eyes were so big and his mouth was wide open. He had only seen things like this in movies. He was so thrilled to find out they were "REAL". Oh to be three again!
Caroline
Hannah 3
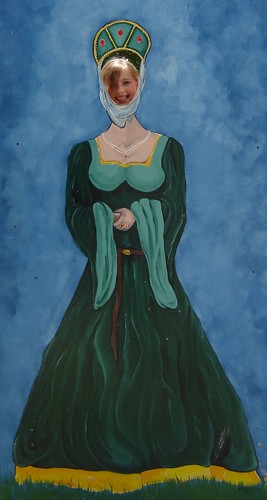
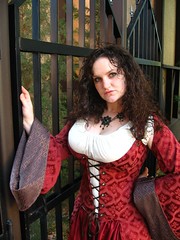
The place was covered with beautiful ladies!
Bryan
Even their dad got in on the fun. He actually enjoyed the "Nerd" Fest. Hmmmm.... Somehow going to Ren Fest wasn't as dump as someone had once thought. hee hee hee
I had a lot of fun too but lucky for us all I was behind the camera. It was bad enough that we saw pound of giggly flesh there that day. Mine was not necessary to see. :o)
I do have to give a plug for the best corset shop ever. Our friends Michelle and Jill were there all month with the Damsel in this Dress corset shop. Check them out. Their stuff is fabulous.
Michelle

Saturday, May 30, 2009

Pirate Pants Tutorial (a.k.a. bandana Pants)

Here is a quick and dirty tutorial for making summer pants for your kids. Once you have be basic concept you can make these for just about anyone and just about any size. I will give some info on that at the end of the Tute.

My kids love these pants and wear them all summer. I have found that they fit about a large 3T to about a size 10 or so. My 11 (almost 12) year old can still wear hers but she is super skinny.

Materials

2 large bandanas (smaller ones would make pants for a toddler)
Thread.


Construction

1. Place two bandanas right sides together.

Pirate Pants Tutorial 001


2. Fold them in half and just out a J shaped piece from one outside corner. The J size I use for most children is about 3" by 9". I came up with that number by measuring their crotch from the top of their bum to their belly button and then dividing that number in half and added a couple of inches. I placed the measuring tape on the fabric in a J shape and evened it up and decided that was my J shape. (sorry not very scientific but it works for me).


Pirate Pants Tutorial 003


I had a little pirate waiting for the pants. Tutorials take oh so long when you are 6 and are waiting for some hot new pants to run around in.

3. Take each leg piece now and fold it in half with right sides together and sew up the inside seams. Since the bandanas are already hemmed you just need to make sure you keep that edge even.


Pirate Pants Tutorial 006


4. Turn one leg right side out and slip it "inside" the other leg. Stitch the crotch seam.

Pirate Pants Tutorial 008Pirate Pants Tutorial 010Pirate Pants Tutorial 013

5. Turn down the waist about 1 1/2" and press. Sew a casing 1" from the outside edge. Leave an opening to run the elastic in. Sew another casing 1/2" from top edge leaving a hole for the elastic in the same place as the first. Run two pieces of elastic through and secure them and finish off the seam. (measure around the waist and cut the elastic to fit. You can "test the elastic first around them and see how snug you want it.)

Pirate Pants Tutorial 015Pirate Pants Tutorial 018Pirate Pants Tutorial 019

You are done!!! One Happy Pirate. These shorts will fit from mid calf to the knee depending on how tall your child is. They are long pants for my 3 year old and shorts for my 11 year old.


Pirate Pants Tutorial 020
You can also make these pants with just fabric if you don't have bandannas. Two fat quarters make pants for a little kid. You can also make these for larger people by using yardage. You want to measure around the widest part and divide that by 2 and add four or five inches. That is how wide each piece of fabric needs to be to go around the waist, hips and legs of a larger person.
Play with the measurements and see what you come up with. You will need to finish the top edge of the pants with a zig-zag or serger and will have to help the pants.

Have fun and please post your pictures in the " Sewing with Mama Byrd Tutorials" flickr group.

Saturday, May 23, 2009

Neapolitan Skirt PDF Ready

It's Done!!! Can you tell I am excited?!
Side 1
The PDF file pattern is finished and ready for sale at my Etsy Shop.
I have also finished up some skirts that are for sale at the shop right now.
Neapolitan skirts finish 003

Tuesday, May 19, 2009

Let's Bake a Sunshine Cake

We have had an exceptionally wet spring this year here in MO.

Sunshine Cake 011

We had almost 3 weeks of rainy weather and very little sunshine. So last week we decided to bake a Sunshine cake to encourage the sun to come out so we can work outside in the garden.
I occasionally go over to Aunt Ruthie's Sugar Pie Farmhouse. I enjoy her music play list. It features songs I heard on old movies growing up or songs my dad used to sing, play or listen to. One of the songs she plays is Sunshine Cake featuring Frank Sinatra with Paula Kelly. Well the words have been stuck in my head and I had to find out if there was a "Sunshine Cake" recipe. Well there is, or I should say are. I found hundreds from vintage cookbooks to Food Network.
A traditional Sunshine cake seems to be type of sponge cake. They all seem to involve Oranges and or lemons. So I searched around and came up with a version we wanted to try and here it is.
Sunshine Cake 014

Mama Byrd's Sunshine Cake Recipe

6 eggs (farm fresh of course), room temperature
1/2 cup cold water
1 cup sugar
1 tsp vanilla
1 tsp lemon juice
1 1/2 Tbsp orange juice
2 Tbsp orange zest
2 tsp lemon zest
1 1/2 C cake flour, sifted **
1 tsp baking powder
1/2 tsp cream of tartar

Pre-heat oven to 325* F.
Separate eggs, putting whites in a large mixing bowl and yolks in another large mixing bowl. Beat egg yolks until light and foamy. Slowly add the water. Gradually beat in the sugar, vanilla, lemon and orange juice and zests. Beat until pale and thick in texture (about 7 minutes). Sift flour again with the salt and baking powder. Return to sifter and fold the flour mixture into the egg yolk mixture, sifting in a little at a time.
Beat egg whites until foamy. Add a pinch of salt and the cream of tartar. Beat until they form glossy peaks.
Pour the egg yolk mixture in a thin stream over the entire surface of the egg whites, gently cutting and folding with a rubber spatula. Make sure you have them completely folded in.
Pour into a 10" round tube pan with a removable bottom (angel food cake pan). Be sure to remove air pockets.
Bake for 1 hour.
Invert on a rack and let cool in the pan for 1 1/2 hours.
Remove from pan and Ice.

This cake doesn't need much dressing but here is what we put on ours.

Orange Icing

Powdered sugar
orange juice
orange zest

Sorry I didn't measure this, I never do. I took about 2 cups of powdered sugar, poured a couple of Tbsp. of orange juice in and some finely chopped zest and stirred adding juice if needed until I hand a runny Icing. I drizzled that over the cake .

Sunshine Cake 018

Enjoy!

** I don't have cake flour, never have and most likely never will. :o) However I do know how to make a good substitute. I mixed 1 1/3 C all purpose flour with 1/4 cup corn starch. It worked just fine.
I also discovered that my baking powder was missing that morning so I made a substitute with 1/2 tsp cream of tartar, 1/4 tsp baking soda, 1/4 tsp corn starch. It works great too.
Sunshine Cake 028
The morning after baking the cake my great nieces Gwenny and Renata and Julia came to spend the day. Jeddie has big sisters so he knows that when girls get together they have tea parties. He saw the cake in the kitchen and pointed to it and said that the girls needed a tea party. He helped me set it up and called them in for herbal tea, cucumber sandwiches, Sunshine cake and fresh fruit. I think they had some fun. They all helped fix up a plate to trot over to grandma's house next door.

Sunshine Cake 023

Saturday, May 02, 2009

Neapolitan Skirt

Thanks to a bug my friend Michelle put in my head a few days ago, I came up with a nifty thrifty, easy peasy skirt pattern to make multi sized, double sided skirts for my girls. The pattern makes skirts from size 6 mos to girls size 14 or larger if you wanted.

Here are the first three I made.

Side 1
Side 1

Side 2
Side 2

I am working up the instructions this weekend with illustrations and am seeking out some handy dandy pattern testers to see if someone else can follow my instructions.
It really is so simple to make, just 3 or 4 steps and you have a lovey, sturdy, double sided skirt with no hem. I really hate sewing hems and gathering.

I would love to hear what you think! Please leave a comment.


*** Edited*****
The Neapolitan Skirt Pattern is for sale in my Etsy Shops Here and Here.
Related Posts Plugin for WordPress, Blogger...