home tutorials recipes aprons/patterns Soaps

Tuesday, February 22, 2011

Jeddie's Fabulous Fish Sticks

The idea for this recipe came from my little boy's Sesame Street Cookbook. Oscar has a great fish stick recipe in there and we adapted it to what we had on hand.

Jeddies Fabulous Fish Sticks


Jeddie's Fabulous Fish Sticks

Fish Fillets - cut into strips (talapia, cod, and orange roughy are good)
milk
flour
bread crumbs
seasoning mix (we like Mrs. Dash Table Blend)
pepper
butter

Cut your fish into eatable strips (what ever size you like).
Set out 4 pie tins or deep plates
-In the first one put milk
-In the second put flour
-In the third put the bread crumbs and the seasonings (I started with 1 cup crumbs and about 1 tsp seasoning and had to keep adding but we use lots of fish). Pour the melted butter (about 1/4 cup) over the crumbs and mix together.

Dip the fish pieces in this order
1-milk
2- flour
3- milk (quickly so it doesn't get soggy)
4- Bread crumbs, seasoning, and butter mix

Then put them on a baking sheet.

Bake at 450 deg F for 10 to 15 minutes depending on how thick the fish is.
They are done when the fish fakes apart with a fork. We noticed that the fish looked a little "soft" when the timer went off but that it firmed up as it rested a little on the tray. Test it with a fork.
Serve with your favorite sauce.
Ours is store bought tar tar sauce. I know I should be making my own but I haven't found and remembered a recipe I like yet.
We are open to suggestions. :o)

Another great cookbook to use with children is Kid's Favorites Made Healthy.

Sunday, February 13, 2011

Soap Winner!

Thank you to all that stopped by and left a comment.

Soap Day 002


The winner of my soap giveaway is....


Schneiderbären said...
Danke für das schöne Candy, Deine Seifen sind einfach super.

Liebe Grüße
Claudia

She gets to pick out 10 scents and I will send them off her way.

Sorry to those of you that didn't win. Thank you for checking out my Etsy shop and giving it some LOVE. :o) You are wonderful.

I will have another fabulous giveaway from my shop in another week or two so come back and check soon.

Friday, February 11, 2011

Friday Give Away! - Soap Samples

I have been snowed in for almost 2 weeks with my five kids. I am ready for something fun today!

Snow day

(we actually got a lot more snow than this, this was the first little bit of snow)

So .... to break the the monotony I am doing a little give away.

I have chosen to give one of my Sample Size bar packages. These bars are 1/4 the size of my regular bars. It gives you a chance to try several of the soaps with having to break the bank to check them out.

sample bars 025

This Sample Pack is for 10 bars of your choice.

If you are picked as the winner, you get to pick the 10 sample size bars I send you.

And YES it is open to international bloggers.

I will take comments all day today and will pick a winner Saturday night/Sunday morning.

To enter the giveaway, leave a comment.

To get an extra entry, go to my etsy shop and favorite it and come back and tell me what soaps you like.

To get 5 extra entries, post the giveaway on your blog (or facebook page) today and come back and leave a link to your blog.

Tuesday, February 08, 2011

Oort Clouds - A Snow Dying Tutorial

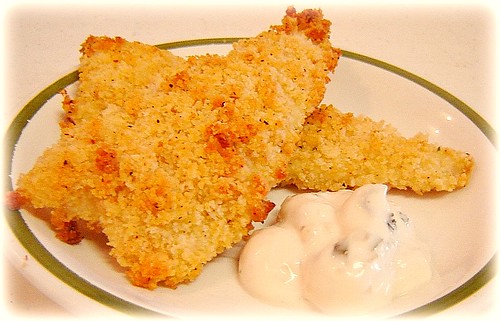
300 posts!! I can't believe it and here is another tutorial.


Blizzard 2011 001


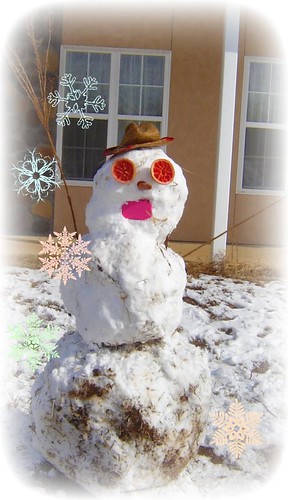
Welcome the the Blizzard of 2011. I have lived here in Southwest Missouri for over 25 years and have never seen snow like this. We got 20 inches of snow last week and it is still here. Amazing. The funny thing about Missouri weather is that it changes all the time. Just over a week ago we had temperatures in the 60's and 70's. The kids were wearing shorts outside. Then 3 days later we were in the middle of the biggest blizzard I have seen since I was a little girl. (maybe not even then)
We cancel school here when there is 1 inch of snow. We are on our second week of NO SCHOOL (except for the one kid doing home school, poor kid just keeps plugging away at his work).
With so much snow at hand and no prospect of it melting for a week, we decided to give Snow Dying a dry. I have seen fabrics labeled as "Snow Dyed" at quilt shows for years but never had enough of the white stuff to give it a try. Well now I got my wish. Happy day!!!


Snow Dye


The procedure is very simple and so much fun to watch.

1. Prepare your fabric for dying by soaking it in Soda Ash solution (1/2 cup salt, 1/3 cup soda ash, and 1 gallon hot water). Soak the fabric for 30 minutes. The fabric has to be 100% cotton and pre-washed to strip off any finishes. Squeeze out the fabric.


Blizzard 2011 013 (800x527)


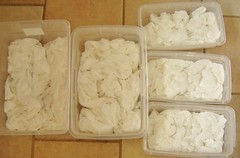
2. Scrunch up the fabric in the bottom of a tub. You can fold it too.


Blizzard 2011 014 (800x800)


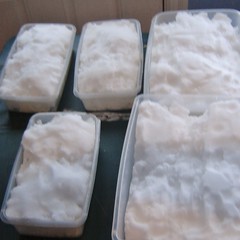
3. Pack the tubs with snow.


Blizzard 2011 015 (800x534) Blizzard 2011 019 (800x547)


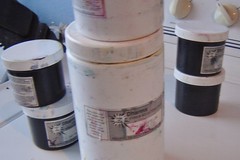
4. Sprinkle dyes right on the snow. I use Dharma Trading Co for my dye supplies.

Blizzard 2011 001 (385x800)


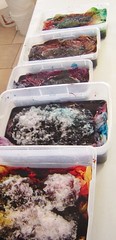
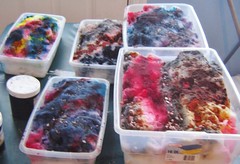
5. Watch the snow melt. This will take a while unless you have a very well heated room. I used my laundry room which has no heat to it. So.... The next morning the snow wasn't that melted. I moved them to the kitchen and them started melting pretty quickly.

6. Finally rinse them out under running water until the water is mostly clear. Then wash them in a top loading machine with synthrapol detergent. If you can't get this, you can use some Dawn dish detergent (about 1 tbsp for a full load).
I washed mine twice, the second washing was in my front loader machine on sanitize with my regular detergent. Then dry them.

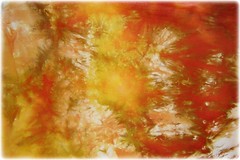
Here are some close ups of some of the fun bits.
Blizzard 2011 016 (800x533) Blizzard 2011 017 (800x533)
Blizzard 2011 018 (800x533) Blizzard 2011 024 (800x533)

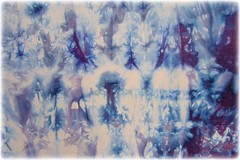
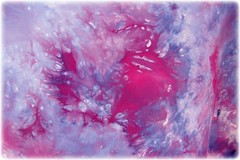
My daughter thinks they look like Oort Clouds. I think she is right. :o)

I think the browns are my favorites. That could just be because they are warm colors and it is so cold this week.

TIPS:
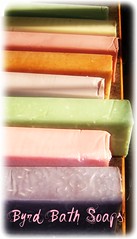
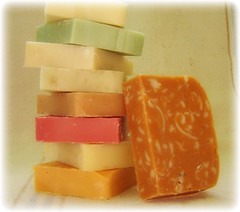
The thing I found to make the most difference was using "mixed" colors not pure primary colors. As mixed color dyes move through the snow and the fabric, they separate and move at their own speeds. This results in the best coloring on your fabric with the most crackles and fissures on the cloth. I love it!! I can't wait to try it with some serous greens and yellows. Only problem is what to do with the fabric now. Sad thing is they will most likely just end up as soap wrappers. I use my own hand dyed fabrics for my soap wrappings.
I think the colors are so much more vibrant because I used dye powder directly on the snow instead of dye solutions. This makes the colors more intense.
Next tries might include putting the fabrics or a rack instead of in tubs so the water drains away. Will see what affect that has. :o)

Monday, February 07, 2011

My Own Towel

With a vain attempt at order..... we made some personalized towels this week. The theory is that if you have your OWN towel, then you will be responsible for it, not leave it on the floor (because Mom WILL know it is YOURS).
At any rate the kids love them and maybe that alone will help them to take care of them. I love new towels too. I let the kids pick out their towels which gave them some ownership in the project which is always a good thing. :o)


Towels tutorial


Here is the quick and dirty tutorial to personalized towels.

1- Print out (or draw) your initials. Very Fat, Chunky letters do a better job of showing up and showing off fun fabrics. Be sure to reverse the letters or they will end up backwards on the towels.
Aprons 005 (800x533)
2 - Trace the letter onto the paper side of "Lite Heat 'n Bond" (my fusible web product of choice).
Aprons 007 (800x534)
3 - Cut out around the letters, leaving a boarder of paper around the letter.
Aprons 011 (800x746)
4 - Iron the letter the back side of your fun fabric. (follow the fusible web instructions)
Aprons 013 (800x534)
5 - Cut out the letter on the lines and position it on the towel and iron in place (follow package instructions again).
Blizzard 2011 013 (800x484)
6 - Stitch around the letter using a zig-zag or satin stitch.

Blizzard 2011 014 (800x533)


7 - Add a tab for easy hanging (optional).

Towels
These make great party favors for kid's parties or birthday gifts. Use a picture like a crown, shield, car, cat, etc. and have a stack ready for spur of the moment birthday gifts for your kid's friends.
Related Posts Plugin for WordPress, Blogger...